spicy_mango_shrimp_stir_fry_4d733194-939a-42ec-ab9c-c28bcd8ad680

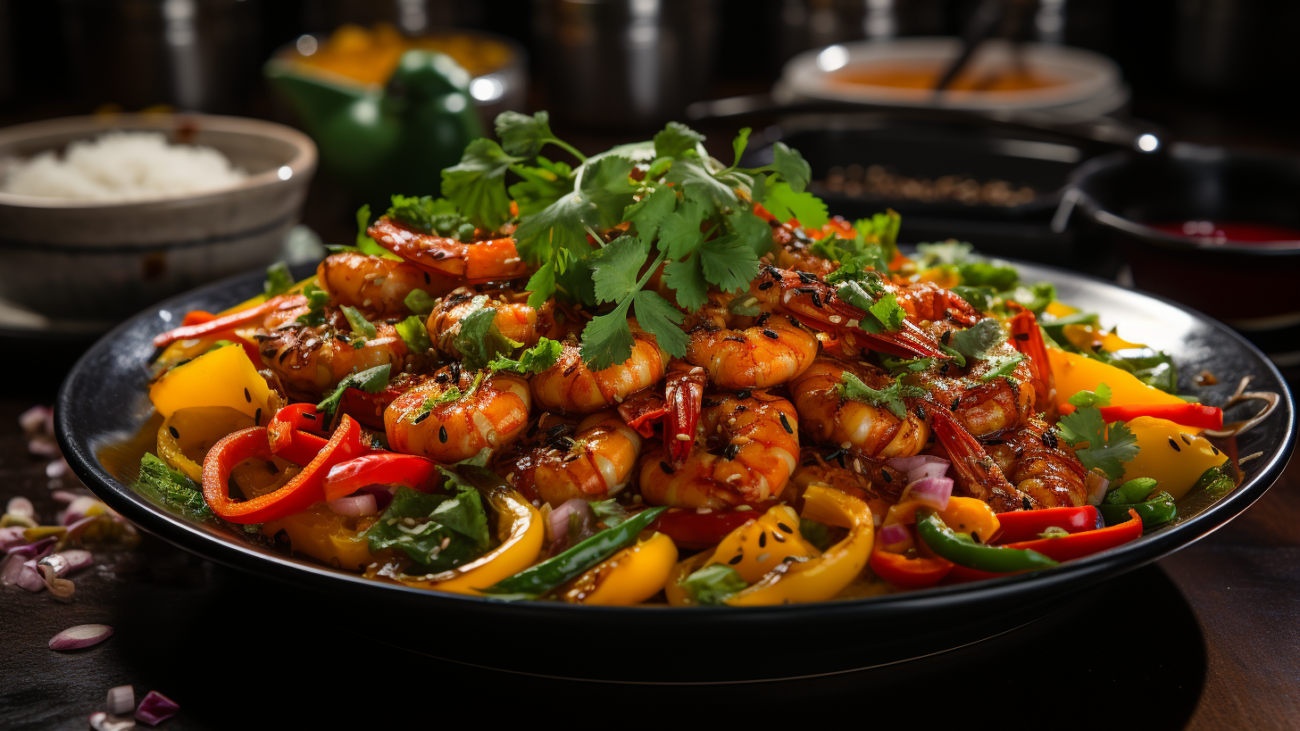
An Exquisite Asian Fusion Delight: Spicy Mango Shrimp Stir-Fry

Spicy Mango Shrimp Stir-Fry

Looking for a delicious and unique Asian Fusion dish? Look no further than our Spicy Mango Shrimp Stir-Fry! This mouthwatering recipe combines the flavors of juicy shrimp, tangy mango, and spicy seasonings to create a dish that will delight your taste buds. Whether you’re a fan of seafood or just love trying new flavors, this recipe is sure to impress. Let’s dive into the details and learn how to make this delectable dish.

Gluten Free Dairy Free Healthy High-protein
Prep Time: 15 minutes
Cook Time: 10 minutes
Total Time: 25 minutes
Servings: 4
CaloriesFatSaturatesSugarsSaltProteinCarbsFibre
2758g1g12g1.5g26g25g4g

Nutrition: The above table indicates nutritional intake per serving for an adult.

Ingredients:

    • 1 pound of shrimp, peeled and deveined
    • 1 mango, peeled and diced
    • 1 red bell pepper, sliced
    • 1 yellow bell pepper, sliced
    • 1 onion, sliced
    • 3 cloves of garlic, minced
    • 1 tablespoon of soy sauce
    • 1 tablespoon of Sriracha sauce
    • 1 tablespoon of honey
    • 1 tablespoon of vegetable oil
    • Salt and pepper to taste

Instructions:

    1. In a small bowl, mix together the soy sauce, Sriracha sauce, and honey. Set aside.
    2. Heat vegetable oil in a large pan or wok over medium-high heat. Add garlic and cook until fragrant.
    3. Add shrimp to the pan and cook for 2-3 minutes on each side, until pink and cooked through. Remove shrimp from pan and set aside.
    4. In the same pan, add the mango, bell peppers, and onion. Stir-fry for 3-4 minutes, until the vegetables are tender-crisp.
    5. Return the shrimp to the pan and pour in the sauce mixture. Stir everything together until well combined and heated through.
    6. Season with salt and pepper to taste.
    7. Serve the Spicy Mango Shrimp Stir-Fry hot over steamed rice or noodles.

And there you have it – a delightful Spicy Mango Shrimp Stir-Fry that will transport your taste buds to the exotic flavors of Asian Fusion cuisine! The combination of succulent shrimp, juicy mango, and spicy seasonings creates a harmony of flavors that is simply irresistible. This dish is not only delicious but also packed with protein, low in fat, and gluten-free. The vibrant colors and fragrant aroma will entice your senses and make this a favorite among family and friends. Make sure to add this recipe to your menu and enjoy the fusion of flavors in every bite. Happy cooking!

garlic_butter_shrimp_pasta_recipe_8b5ae908-0405-4aff-aaa4-bdec6bc2cc16

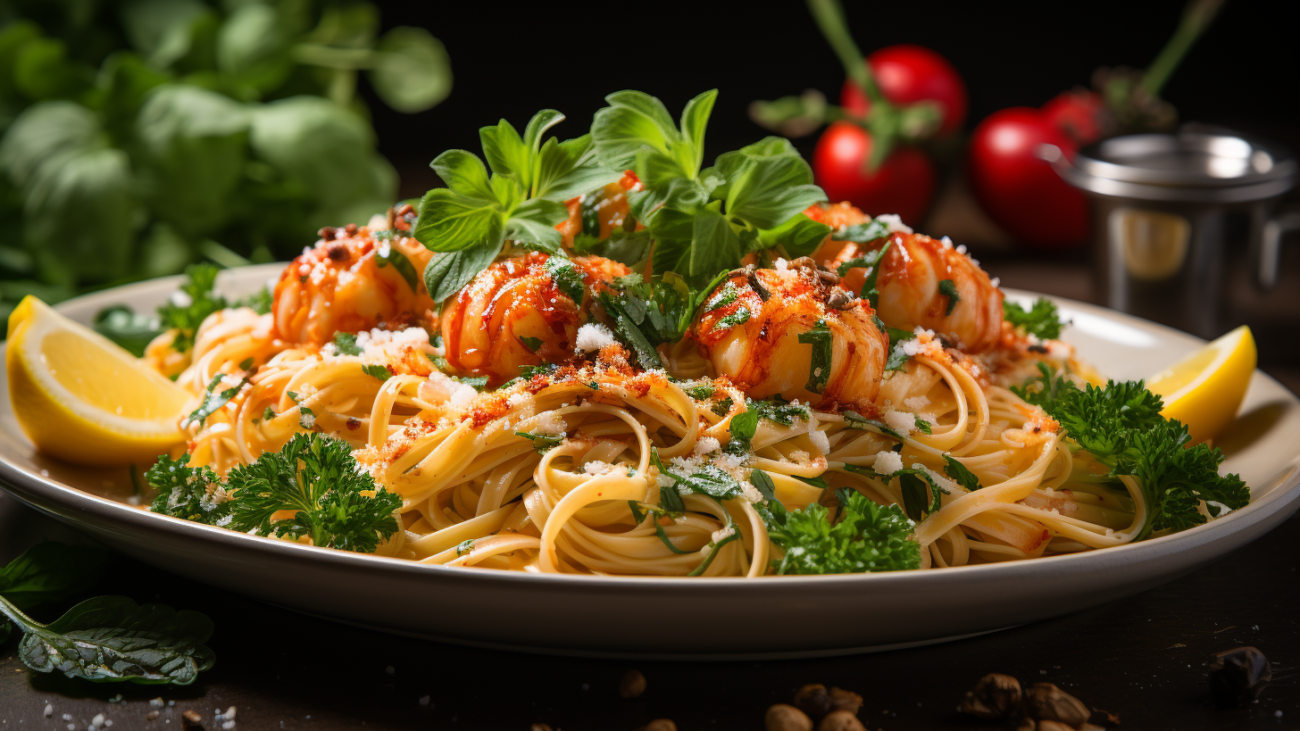
The Ultimate Garlic Butter Shrimp Pasta Recipe

The Ultimate Garlic Butter Shrimp Pasta

Indulge in the flavors of the Mediterranean with this mouthwatering Garlic Butter Shrimp Pasta recipe. Bursting with garlic, buttery shrimp, and al dente pasta, this dish is a perfect combination of savory and satisfying. Whether you’re hosting a dinner party or treating yourself to a luxurious weeknight meal, this recipe is sure to impress. Get ready to savor every bite of this tantalizing main course.

Healthy High-protein
Prep Time: 10 minutes
Cook Time: 15 minutes
Total Time: 25 minutes
Servings: 4
CaloriesFatSaturatesSugarsSaltProteinCarbsFibre
41018g9g2g1g28g33g2g

Nutrition: The above table indicates nutritional intake per serving for an adult.

Ingredients:

    • 8 ounces linguine pasta
    • 1 pound large shrimp, peeled and deveined
    • 4 tablespoons unsalted butter
    • 4 cloves garlic, minced
    • 1/2 cup chicken broth
    • 1/4 cup chopped fresh parsley
    • 1 tablespoon lemon juice
    • Salt and black pepper to taste

Instructions:

    1. Cook the linguine pasta according to package instructions. Drain and set aside.
    2. In a large skillet, melt the butter over medium heat. Add the minced garlic and cook for 1 minute until fragrant.
    3. Add the shrimp to the skillet and cook for 2-3 minutes on each side until pink and opaque.
    4. Remove the shrimp from the skillet and set aside.
    5. Add the chicken broth, chopped parsley, lemon juice, salt, and pepper to the skillet. Bring to a simmer and cook for 2 minutes.
    6. Add the cooked linguine pasta and cooked shrimp back to the skillet. Toss to coat everything in the garlic butter sauce.
    7. Remove from heat and serve the Garlic Butter Shrimp Pasta immediately. Garnish with additional parsley if desired.
Experience the incredible combination of flavors with this Garlic Butter Shrimp Pasta. The succulent shrimp, aromatic garlic, and rich butter sauce create a symphony of taste that will have you coming back for seconds. Whether you’re a seafood lover or simply want to impress your guests, this dish is a true winner. Treat yourself to a taste of the Mediterranean and enjoy the pure satisfaction of this delightful main course.
crispy_fried_chicken_recipe_2cff9386-6453-44e5-b574-494a5e54470a

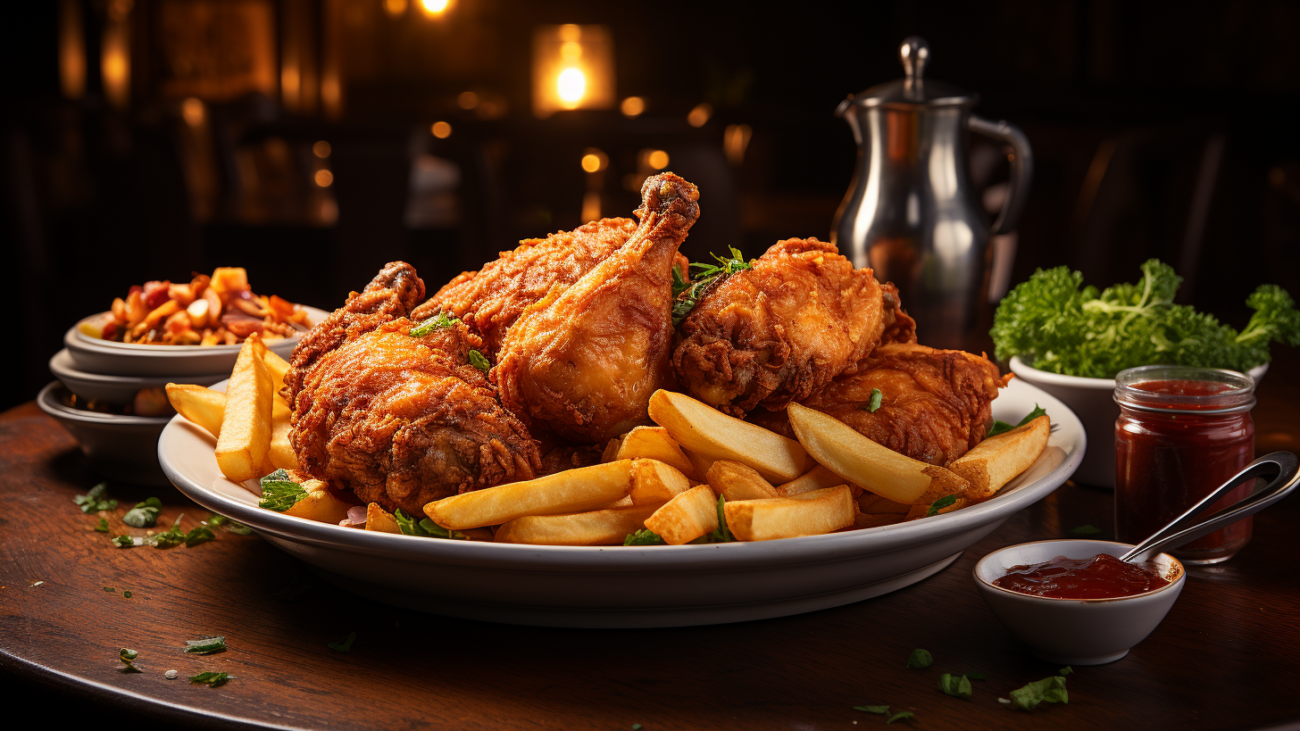
The Ultimate Crispy Fried Chicken Recipe for Comfort Food Lovers

The Ultimate Crispy Fried Chicken Recipe

Indulge in the ultimate comfort food with this crispy fried chicken recipe. Perfectly seasoned and fried to golden perfection, this dish will satisfy all your cravings. Whether you’re enjoying it for a cozy night in or a gathering with friends, this recipe is guaranteed to impress. Get ready to experience the comforting flavors and irresistible crunch of homemade fried chicken. Let’s dive right into the recipe!

Comfort Food High-protein
Prep Time: 15 minutes
Cook Time: 25 minutes
Total Time: 40 minutes
Servings: 4
CaloriesFatSaturatesSugarsSaltProteinCarbsFibre
35018g5g0g1g30g15g1g

Nutrition: The above table indicates nutritional intake per serving for an adult.

Ingredients:

    • 4 chicken drumsticks
    • 4 chicken thighs
    • 1 cup buttermilk
    • 2 cups all-purpose flour
    • 1 tablespoon paprika
    • 1 tablespoon garlic powder
    • 1 teaspoon salt
    • 1 teaspoon black pepper
    • Vegetable oil, for frying

Instructions:

    1. In a bowl, combine buttermilk, paprika, garlic powder, salt, and black pepper. Add chicken pieces and marinate for at least 30 minutes.
    2. In a shallow dish, mix the flour with additional paprika, garlic powder, salt, and black pepper.
    3. Heat vegetable oil in a deep skillet or frying pan over medium-high heat.
    4. Dredge the marinated chicken pieces in the seasoned flour, making sure they are fully coated.
    5. Carefully place the coated chicken in the hot oil and fry until golden brown, about 10-12 minutes per side.
    6. Remove the fried chicken from the oil and let it drain on a paper towel-lined plate.
    7. Serve hot and enjoy the crispy and flavorful homemade fried chicken!

Indulge in the irresistible goodness of this homemade crispy fried chicken recipe. The crispy crust, combined with the juicy and tender meat, will leave you craving for more. Serve it with your favorite sides like mashed potatoes, coleslaw, or cornbread for the ultimate comfort food experience. Gather your loved ones and enjoy this delicious dish together. Don’t forget to subscribe to our newsletter for more savory recipes and culinary inspirations. Stay tuned for mouthwatering delights!

paleo_breakfast_recipe_sweet_potato_pancakes_02e423f0-8042-47e5-8084-c06f7b150034

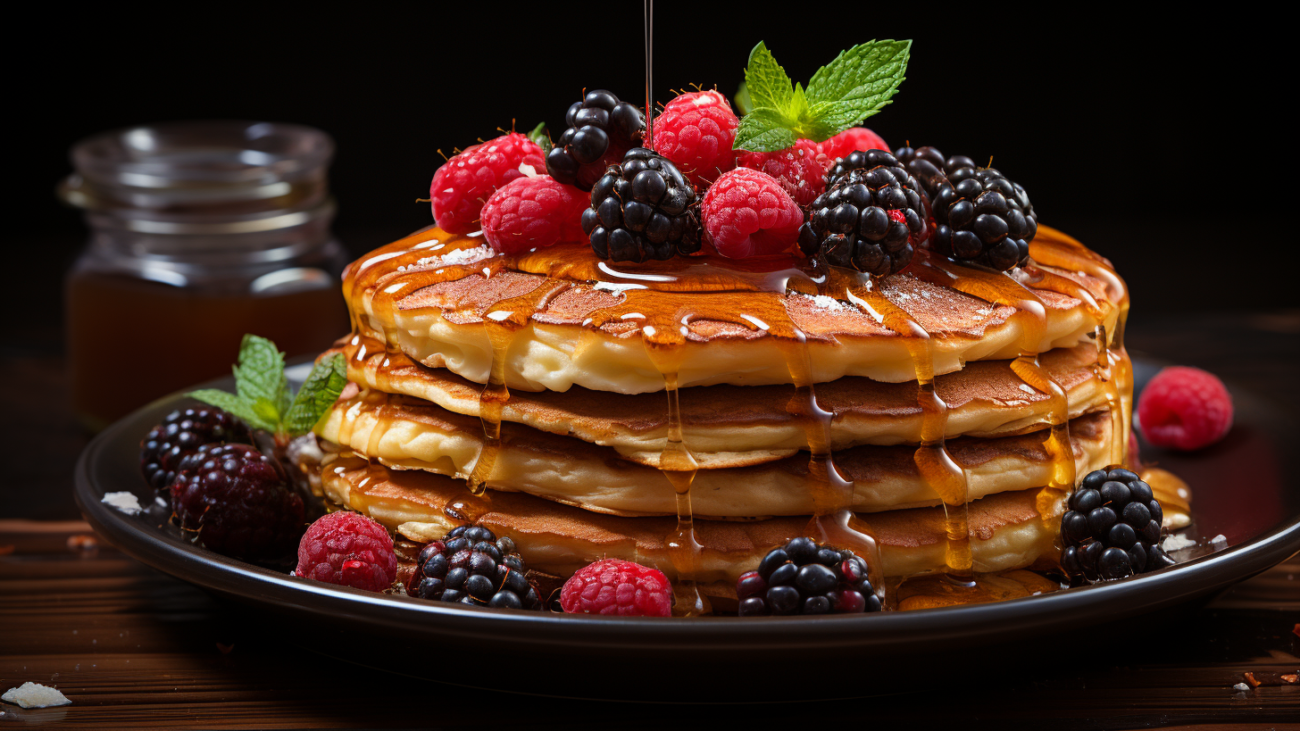
Delicious Paleo Breakfast Recipe: Sweet Potato Pancakes

Sweet Potato Pancakes

Are you searching for a tasty and nutritious breakfast option? Look no further than these mouthwatering Sweet Potato Pancakes. Made with fresh sweet potatoes, these pancakes are packed with flavor and are perfect for those following a paleo diet. Plus, they are gluten-free, dairy-free, and high in fiber. Start your morning right with this delicious and energizing dish.

Paleo Gluten Free Dairy Free Healthy High-fiber
Prep Time: 15 minutes
Cook Time: 15 minutes
Total Time: 30 minutes
Servings: 4
CaloriesFatSaturatesSugarsSaltProteinCarbsFibre
2208g1g6g0.5g6g32g4g

Nutrition: The above table indicates nutritional intake per serving for an adult.

Ingredients:

    • 2 medium sweet potatoes, peeled and grated
    • 2 eggs
    • 1/4 cup almond flour
    • 1/4 teaspoon cinnamon
    • 1/4 teaspoon nutmeg
    • 1/2 teaspoon baking powder
    • Pinch of salt
    • Coconut oil, for frying
    • Optional toppings: maple syrup, berries

Instructions:

    1. In a large bowl, combine the grated sweet potatoes, eggs, almond flour, cinnamon, nutmeg, baking powder, and salt. Mix until well combined.
    2. Heat a tablespoon of coconut oil in a large non-stick skillet over medium heat.
    3. Scoop 1/4 cup of the sweet potato mixture onto the skillet and flatten it with a spatula. Cook for 3-4 minutes on each side, until golden brown and cooked through.
    4. Transfer the cooked pancakes to a plate and keep warm. Repeat the process with the remaining sweet potato mixture.
    5. Serve the sweet potato pancakes with optional toppings like maple syrup and berries. Enjoy!
These Sweet Potato Pancakes are a delicious and nutritious way to start your day. With the natural sweetness of the sweet potatoes and the warm spices, they are sure to satisfy your cravings. Plus, they are easy to make and can be customized with your favorite toppings. Give this paleo breakfast recipe a try and enjoy a guilt-free and flavorful meal.
asian_fusion_recipe_teriyaki_chicken_stir_fry_48f1f27b-71af-4c7c-b39d-d134640916e1

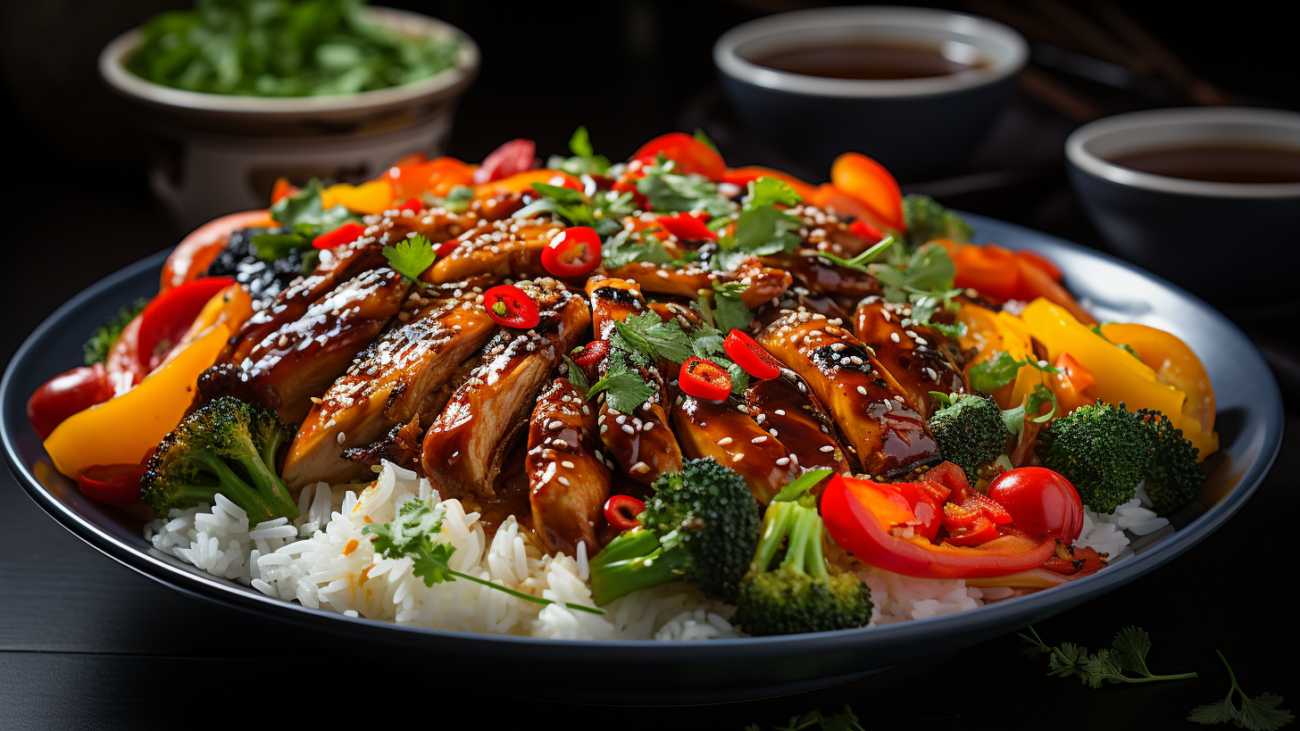
Delicious Asian Fusion Recipe: Teriyaki Chicken Stir Fry

Teriyaki Chicken Stir Fry

Indulge in the perfect blend of flavors with this mouthwatering Teriyaki Chicken Stir Fry recipe. Bursting with Asian Fusion influences, this dish combines succulent chicken, crisp vegetables, and a sweet and savory teriyaki sauce. Whether you’re a fan of stir fry or looking to try something new, this recipe is sure to impress your taste buds.

Healthy High-protein
Prep Time: 15 minutes
Cook Time: 15 minutes
Total Time: 30 minutes
Servings: 4
CaloriesFatSaturatesSugarsSaltProteinCarbsFibre
35010g2g10g1g25g40g6g

Nutrition: The above table indicates nutritional intake per serving for an adult.

Ingredients:

    • 1 lb chicken breast, sliced
    • 2 tablespoons vegetable oil
    • 1 red bell pepper, sliced
    • 1 yellow bell pepper, sliced
    • 1 onion, sliced
    • 2 cups broccoli florets
    • 1 cup snap peas
    • 3 cloves garlic, minced
    • 1/4 cup low-sodium soy sauce
    • 2 tablespoons honey
    • 1 tablespoon rice vinegar
    • 1 teaspoon sesame oil
    • 1 tablespoon cornstarch
    • Sesame seeds, for garnish
    • Green onions, sliced, for garnish

Instructions:

    1. In a small bowl, whisk together soy sauce, honey, rice vinegar, sesame oil, and cornstarch. Set aside.
    2. Heat vegetable oil in a large skillet or wok over medium-high heat.
    3. Add chicken and cook until browned and cooked through, about 5-6 minutes. Remove from skillet and set aside.
    4. In the same skillet, add garlic, bell peppers, onion, broccoli, and snap peas. Stir fry for 3-4 minutes until vegetables are tender-crisp.
    5. Return cooked chicken to the skillet and pour the teriyaki sauce over the ingredients.
    6. Cook for an additional 2-3 minutes, stirring constantly, until the sauce thickens and coats the chicken and vegetables.
    7. Remove from heat and garnish with sesame seeds and green onions.
    8. Serve hot over steamed rice or noodles.
Experience the tantalizing flavors of this Asian Fusion delight. The combination of tender chicken, vibrant vegetables, and rich teriyaki sauce will leave you craving for more. Whether you’re cooking for friends or enjoying a cozy meal at home, this Teriyaki Chicken Stir Fry is a guaranteed crowd-pleaser. Give it a try and elevate your culinary skills to new heights.
homemade_pasta_recipe_cf0dc9cb-a2d0-424d-a55b-b47117551447

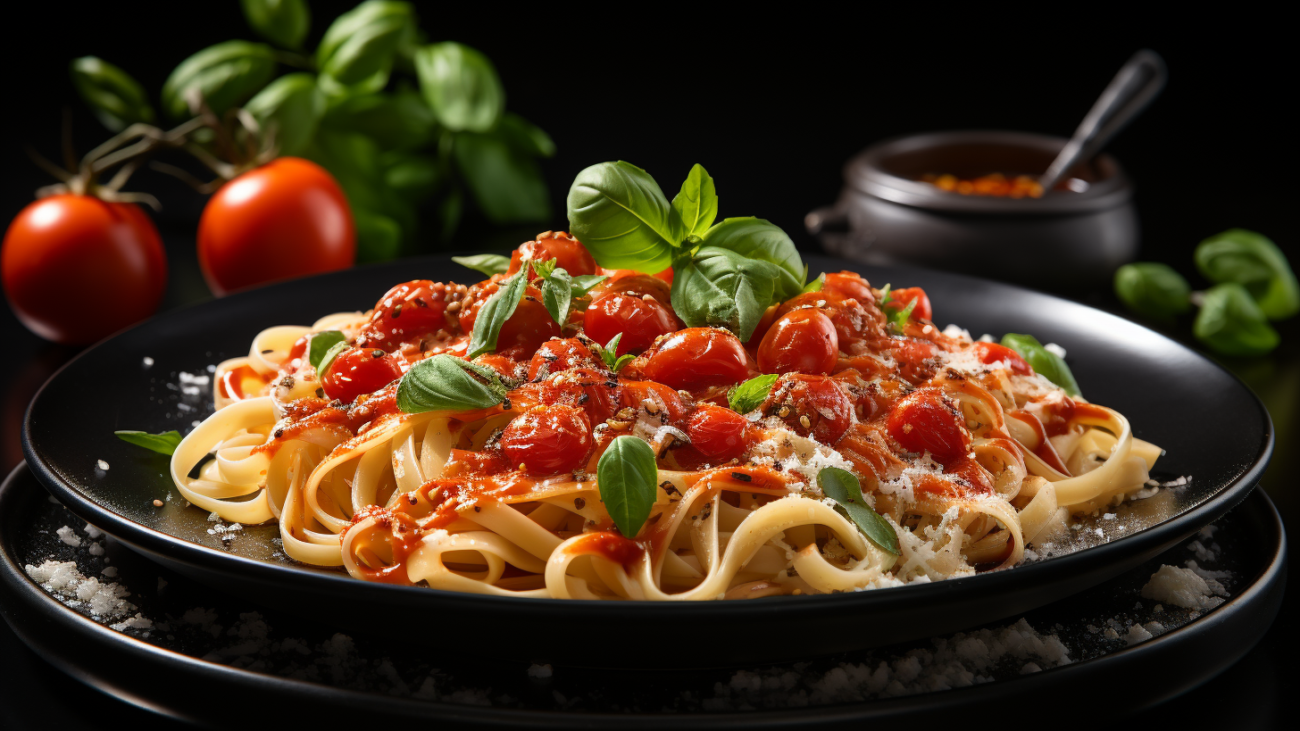
Delicious Homemade Pasta Recipe that Will Leave You Craving for More

Homemade Pasta with Fresh Tomato Sauce

Are you ready to embark on a culinary journey with this mouthwatering homemade pasta recipe? Indulge in the rich flavors of al dente pasta smothered in a fresh tomato sauce that will leave you craving for more. This delightful pasta dish is easy to prepare and will impress your family and friends. Get ready to tantalize your taste buds with this delectable Italian classic.

Vegetarian Healthy
Prep Time: 20 minutes
Cook Time: 30 minutes
Total Time: 50 minutes
Servings: 4
CaloriesFatSaturatesSugarsSaltProteinCarbsFibre
3508g1g6g1g12g60g5g

Nutrition: The above table indicates nutritional intake per serving for an adult.

Ingredients:

    • 300g fresh pasta
    • 4 ripe tomatoes, diced
    • 2 cloves of garlic, minced
    • 1 tablespoon olive oil
    • 1 teaspoon dried basil
    • Salt and pepper to taste
    • Grated Parmesan cheese for garnish

Instructions:

    1. Bring a large pot of salted water to a boil and cook the fresh pasta according to the package instructions. Drain and set aside.
    2. In a separate pan, heat the olive oil over medium heat. Add the minced garlic and sauté until fragrant.
    3. Add the diced tomatoes, dried basil, salt, and pepper to the pan. Cook for about 10 minutes, stirring occasionally, until the tomatoes break down and a sauce forms.
    4. Combine the cooked pasta with the tomato sauce and toss until well coated. Serve hot, garnished with grated Parmesan cheese.

Experience the satisfaction of creating your own delicious pasta dish from scratch. The combination of fresh ingredients and simple preparation will make this recipe a favorite in your kitchen. Whether you’re a pasta lover or just looking for a wholesome meal, this homemade pasta with fresh tomato sauce is sure to impress. Enjoy the authentic flavors of Italy in every bite. Buon appetito!

perfect_cinnamon_rolls_recipe_homemade_48d66ce5-e09b-4233-bac2-3ac35d13a006

The Perfect Cinnamon Rolls Recipe: Homemade Delights

The Perfect Cinnamon Rolls Recipe

Warm and gooey, freshly baked cinnamon rolls are a timeless classic that can be enjoyed for breakfast, brunch, or as a sweet treat any time of the day. This homemade cinnamon rolls recipe will guide you through the process of creating soft, fluffy rolls infused with the irresistible aroma of cinnamon and sugar. Whether you’re an experienced baker or a beginner in the kitchen, these cinnamon rolls are sure to impress. Get ready to indulge in pure comfort and delight!

VegetarianDairy Free
Prep Time: 20 minutes Cook Time: 25 minutes Total Time: 2 hours 45 minutes Servings: 12 rolls
CaloriesFatSaturatesSugarsSaltProteinCarbsFibre
2608g5g18g0.5g4g43g2g

Nutrition: The above table indicates nutritional intake per serving for an adult.

Ingredients:

      • For the dough:
      • – 4 cups all-purpose flour
      • – 1/4 cup granulated sugar
      • – 2 1/4 teaspoons instant yeast
      • – 1 teaspoon salt
      • – 1 cup warm milk
      • – 1/4 cup unsalted butter, melted
      • – 2 large eggs
      • For the filling:
      • – 1 cup brown sugar
      • – 2 1/2 tablespoons ground cinnamon
      • – 1/4 cup unsalted butter, softened
    • For the cream cheese frosting:
    • – 4 oz cream cheese, softened
    • – 1/4 cup unsalted butter, softened
    • – 1 1/2 cups powdered sugar
    • – 1/2 teaspoon vanilla extract

Instructions:

    1. In a large mixing bowl, combine the flour, sugar, yeast, and salt.
    2. In a separate bowl, whisk together the warm milk, melted butter, and eggs.
    3. Add the wet ingredients to the dry ingredients and mix until a dough forms.
    4. Knead the dough on a floured surface for 5-7 minutes, until smooth and elastic.
    5. Place the dough in a greased bowl, cover it, and let it rise in a warm place for 1 hour, or until doubled in size.
    6. While the dough is rising, prepare the filling by mixing the brown sugar, cinnamon, and softened butter in a small bowl.
    7. Once the dough has risen, punch it down and roll it out into a large rectangle.
    8. Spread the filling evenly over the dough, leaving a small border.
    9. Starting from one long edge, tightly roll up the dough into a log.
    10. Cut the log into 12 equal-sized rolls.
    11. Place the rolls in a greased baking dish, cover them, and let them rise for another 45 minutes.
    12. Preheat the oven to 375°F (190°C).
    13. Bake the cinnamon rolls for 20-25 minutes, or until golden brown.
    14. While the rolls are baking, prepare the cream cheese frosting by beating the softened cream cheese, softened butter, powdered sugar, and vanilla extract together until smooth and creamy.
    15. Remove the rolls from the oven and let them cool for a few minutes.
    16. Spread the cream cheese frosting over the warm rolls.
    17. Serve and enjoy!
These homemade cinnamon rolls are perfect for sharing with family and friends. The soft, pillowy texture combined with the warm, fragrant cinnamon filling and decadent cream cheese frosting will leave everyone craving for more. Treat yourself to the ultimate comfort food and enjoy the simple pleasure of homemade goodness.
instant_pot_chicken_curry_99bd0c92-70fc-4e0c-904d-02b9baf2cfd5

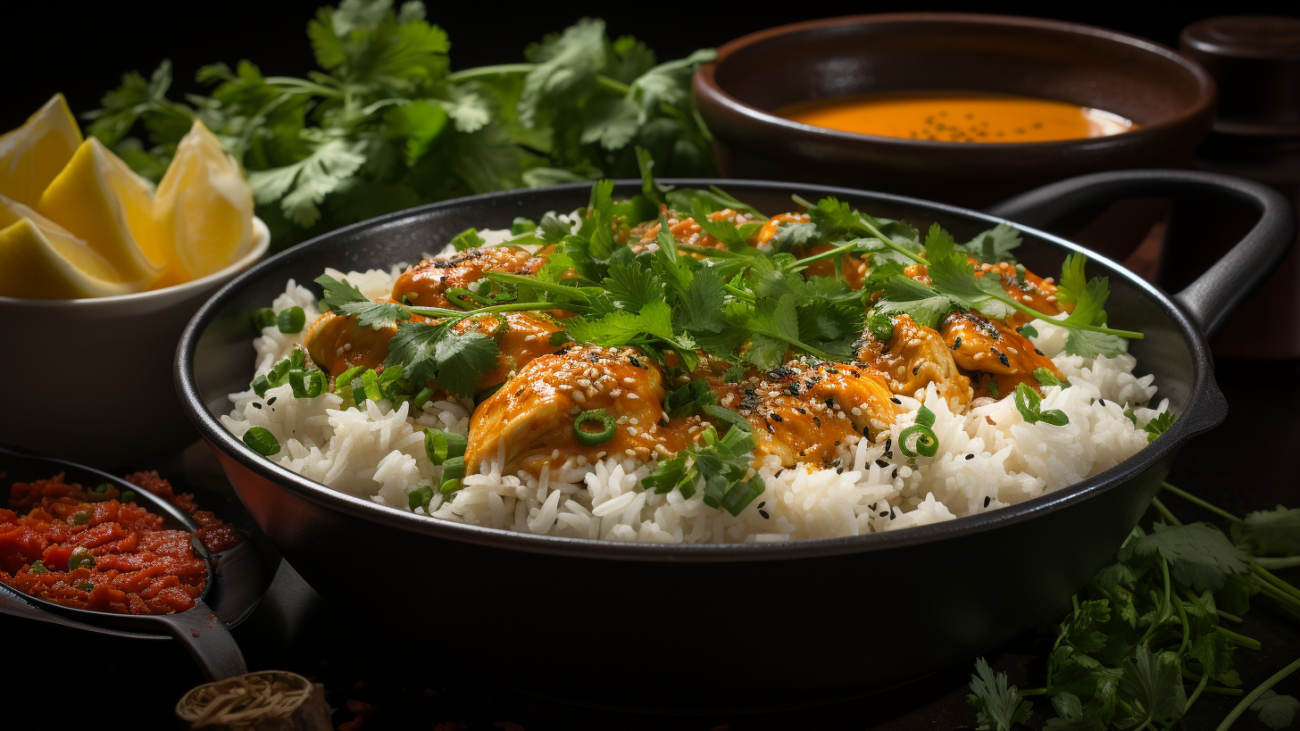
The Ultimate Instant Pot Chicken Curry Recipe

Instant Pot Chicken Curry

Warm up your taste buds with this flavorful and aromatic Instant Pot Chicken Curry. Made with tender chicken, fragrant spices, and creamy coconut milk, this dish is a perfect blend of comfort and exotic flavors. Whether you’re a fan of Indian cuisine or just looking for a quick and delicious meal, this Instant Pot Chicken Curry will not disappoint. Let’s dive into the recipe and experience the magic of the Instant Pot!

Instant PotFood RecipeFood DishesChicken CurryIndian CuisineDairy Free
Prep Time: 10 minutes
Cook Time: 25 minutes
Total Time: 35 minutes
Servings: 4
CaloriesFatSaturatesSugarsSaltProteinCarbsFibre
33016g10g4g2g30g20g4g

Nutrition: The above table indicates nutritional intake per serving for an adult.

Ingredients:

    • 1.5 lb chicken breast, cut into bite-sized pieces
    • 1 onion, finely chopped
    • 3 cloves of garlic, minced
    • 1-inch piece of ginger, grated
    • 1 can (14 oz) diced tomatoes
    • 1 can (13.5 oz) coconut milk
    • 2 tablespoons curry powder
    • 1 teaspoon turmeric powder
    • 1 teaspoon cumin powder
    • 1 teaspoon coriander powder
    • 1/2 teaspoon chili powder (adjust to taste)
    • Salt, to taste
    • 2 tablespoons cooking oil
    • Fresh cilantro, for garnish

Instructions:

    1. Turn on the Instant Pot and select the “Saute” function. Heat the cooking oil in the pot.
    2. Add the chopped onion and saute until translucent.
    3. Add the minced garlic and grated ginger. Saute for an additional minute.
    4. Add the chicken pieces to the pot and brown them on all sides.
    5. Stir in the curry powder, turmeric powder, cumin powder, coriander powder, and chili powder. Cook for a minute to toast the spices.
    6. Add the diced tomatoes (with their juices) and coconut milk to the pot. Season with salt.
    7. Close the Instant Pot lid and set the valve to the “Sealing” position.
    8. Select the “Pressure Cook” or “Manual” function and set the timer for 10 minutes on high pressure.
    9. Once the cooking time is complete, allow for a natural pressure release for 5 minutes, then perform a quick pressure release to release any remaining pressure.
    10. Open the Instant Pot and give the curry a good stir. If desired, use a spoon to shred the chicken into smaller pieces.
    11. Garnish with fresh cilantro and serve the Instant Pot Chicken Curry over steamed rice or with naan bread.

There you have it – a mouthwatering and hassle-free Instant Pot Chicken Curry! The rich and creamy sauce, combined with perfectly cooked chicken, will make you feel like a culinary genius. Serve it to family and friends, and watch their faces light up with delight. Don’t forget to bookmark this recipe and explore our website for more delicious Instant Pot recipes. Happy cooking!

roasted_vegetables_025cc7fe-2a7e-4239-a116-afb054ffb4cc

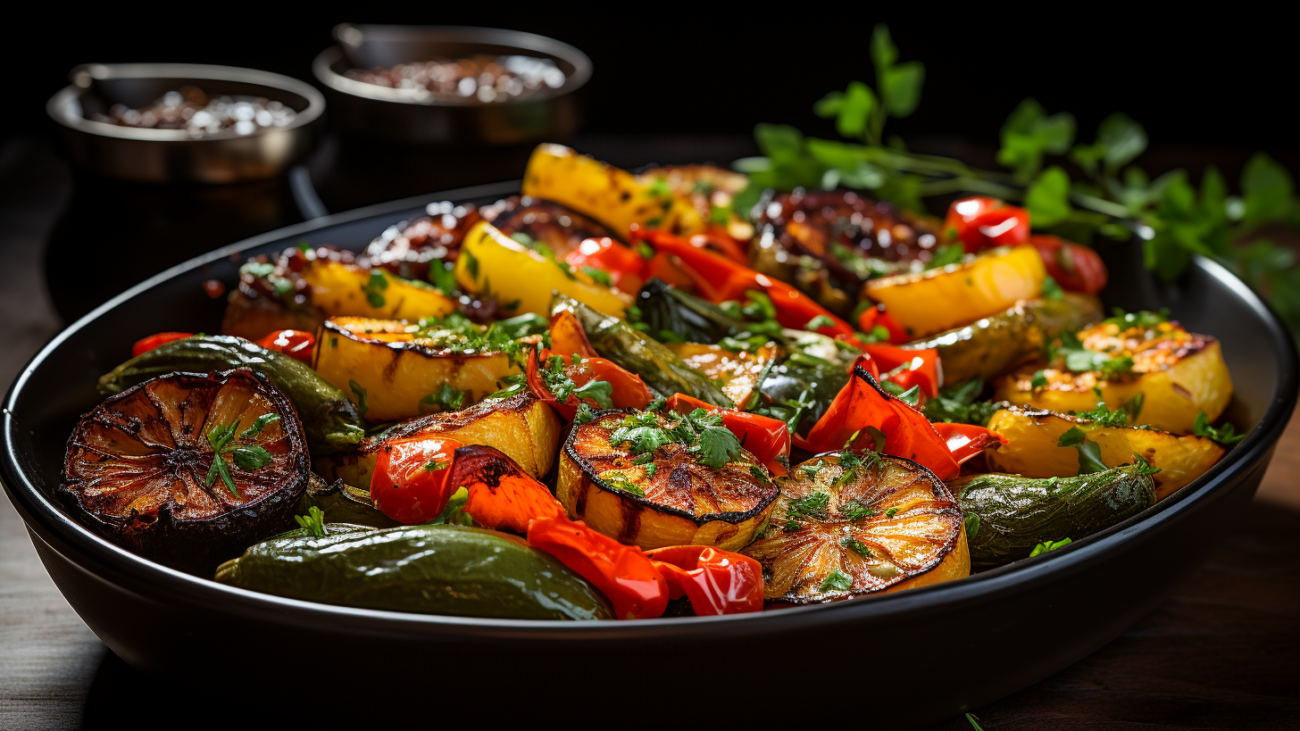
The Ultimate Vegetable Medley Recipe – Bursting with Flavor and Nutrients!

Vegetable Medley with Roasted Potatoes and Balsamic Glaze

Looking for a delicious and nutritious way to enjoy a variety of vegetables? Try this vibrant Vegetable Medley with Roasted Potatoes and Balsamic Glaze recipe! Packed with flavors and nutrients, this dish is a perfect option for a healthy and satisfying meal. Whether you’re a vegetarian, trying to eat gluten-free, or simply looking for a flavorful vegetable dish, this recipe has got you covered! Let’s dive in and explore the amazing flavors of this delightful medley.

Vegan Gluten-Free High-Fiber Low-Calorie Healthy
Prep Time: 15 minutes
Cook Time: 40 minutes
Total Time: 55 minutes
Servings: 4
CaloriesFatSaturatesSugarsSaltProteinCarbsFibre
1805g0.5g8g0.5g6g30g10g

Nutrition: The above table indicates nutritional intake per serving for an adult.

Ingredients:

    • 1 lb baby red potatoes, halved
    • 1 red bell pepper, sliced
    • 1 yellow bell pepper, sliced
    • 1 zucchini, sliced
    • 1 yellow squash, sliced
    • 1 red onion, sliced
    • 2 tablespoons olive oil
    • 1 tablespoon balsamic vinegar
    • 1 teaspoon dried thyme
    • 1 teaspoon garlic powder
    • Salt and pepper to taste

Instructions:

    1. Preheat the oven to 425°F (220°C).
    2. In a large baking dish, toss the halved baby red potatoes with 1 tablespoon of olive oil, dried thyme, garlic powder, salt, and pepper. Spread them out in an even layer.
    3. Bake the potatoes for 20 minutes, or until they start to brown and become tender.
    4. In the meantime, in a separate baking dish, toss the sliced bell peppers, zucchini, yellow squash, and red onion with the remaining tablespoon of olive oil, balsamic vinegar, salt, and pepper.
    5. After the potatoes have baked for 20 minutes, add the vegetable mixture to the oven and roast for an additional 20 minutes, or until the vegetables are tender and slightly caramelized.
    6. Remove both baking dishes from the oven.
    7. Serve the roasted potatoes and vegetable medley together on a platter, drizzling any leftover balsamic glaze from the baking dish over the top.
    8. Enjoy your flavorful and nutritious Vegetable Medley with Roasted Potatoes!

This Vegetable Medley with Roasted Potatoes and Balsamic Glaze is a true delight for both your taste buds and your health. The combination of roasted vegetables and the tangy balsamic glaze creates a harmonious blend of flavors that will leave you craving for more. Whether you serve it as a standalone dish or as a side, this recipe is sure to impress your friends and family. So, what are you waiting for? Give this recipe a try and embark on a culinary journey of vegetables like never before!

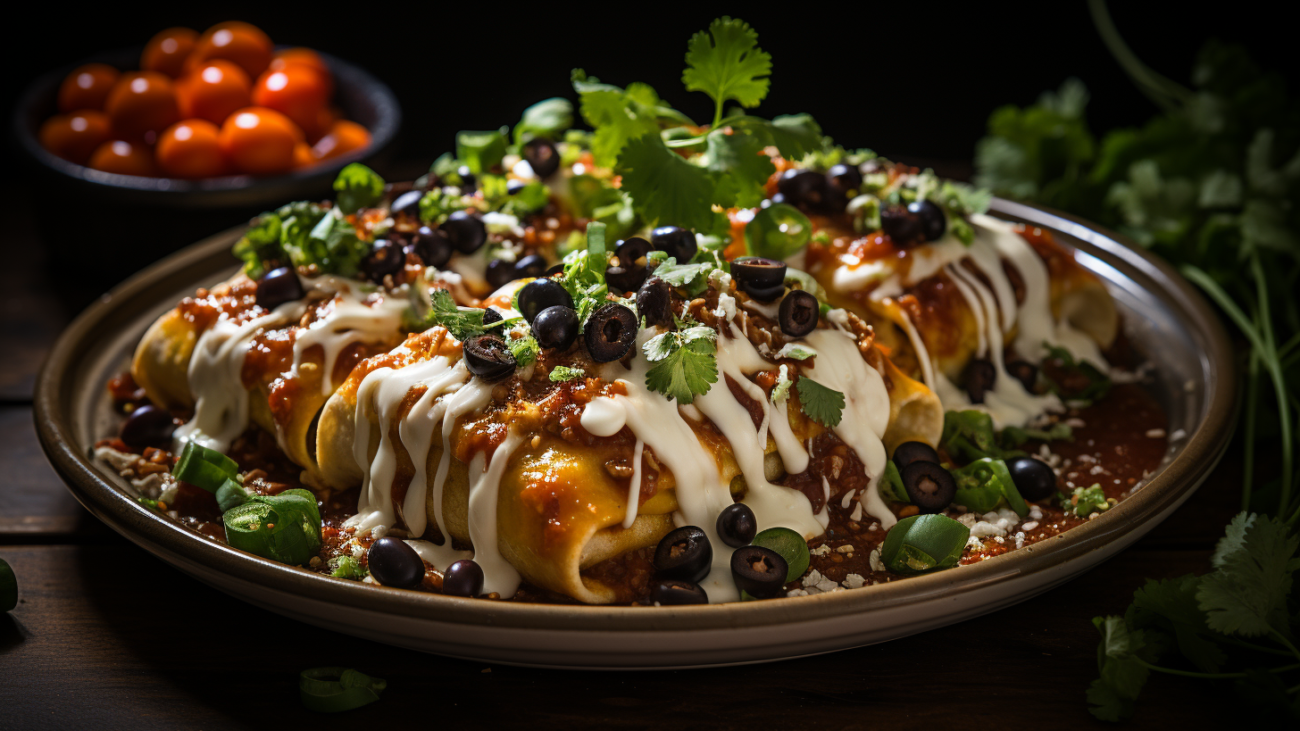
freshly_baked_Tex-Mex_enchiladas_efdae056-ebdd-423b-94d1-4f3de4a40bac

Delicious Tex-Mex Enchiladas Recipe: A Perfect Blend of Flavors!

Tex-Mex Enchiladas

If you’re a fan of Mexican cuisine, Tex-Mex enchiladas will surely delight your taste buds. This mouthwatering dish combines the bold flavors of Texan and Mexican cuisines, resulting in a tantalizing culinary experience. Whether you’re hosting a dinner party or simply craving a satisfying meal, Tex-Mex enchiladas are the perfect choice. Let’s dive into this delectable recipe and learn how to make these irresistible enchiladas!

Vegetarian Gluten-Free
Prep Time: 20 minutes
Cook Time: 30 minutes
Total Time: 50 minutes
Servings: 4
CaloriesFatSaturatesSugarsSaltProteinCarbsFibre
35012g6g4g1g15g45g8g

Nutrition: The above table indicates nutritional intake per serving for an adult.

Ingredients:

    • 8 corn tortillas
    • 1 cup cooked black beans
    • 1 cup shredded cheddar cheese
    • 1/2 cup diced red bell pepper
    • 1/2 cup diced green bell pepper
    • 1/4 cup chopped fresh cilantro
    • 1/4 cup diced red onion
    • 1/4 cup diced ripe tomatoes
    • 1/4 cup sliced black olives
    • 1/4 cup diced jalapenos
    • 1/2 cup enchilada sauce
    • 1/4 cup sour cream
    • 1 tablespoon olive oil
    • 1 teaspoon chili powder
    • 1 teaspoon ground cumin
    • 1/2 teaspoon garlic powder
    • Salt and pepper to taste

Instructions:

    1. Preheat your oven to 375°F (190°C).
    2. In a large skillet, heat olive oil over medium heat. Add diced red and green bell peppers, diced red onion, and sauté until tender, about 5 minutes.
    3. Add cooked black beans, chili powder, ground cumin, garlic powder, salt, and pepper to the skillet. Stir well to combine and cook for an additional 3-4 minutes.
    4. In a separate small pan, heat up the corn tortillas until they become pliable.
    5. Spread a thin layer of enchilada sauce on the bottom of a baking dish.
    6. Assemble the enchiladas by placing a spoonful of the black bean mixture onto each tortilla, then roll up and place seam-side down in the baking dish.
    7. Pour the remaining enchilada sauce over the rolled tortillas, making sure they are evenly coated.
    8. Sprinkle shredded cheddar cheese on top and bake in the preheated oven for 20-25 minutes, or until the cheese is melted and bubbly.
    9. Remove from the oven and let it cool for a few minutes.
    10. Garnish with chopped cilantro, diced tomatoes, sliced black olives, diced jalapenos, and a dollop of sour cream.
    11. Serve hot and enjoy your delicious Tex-Mex enchiladas!
These Tex-Mex enchiladas are bursting with flavors and textures, making every bite incredibly satisfying. The combination of savory black beans, gooey cheese, and zesty enchilada sauce creates a symphony of taste that will transport you straight to the heart of Tex-Mex cuisine. Whether you’re following a vegetarian or gluten-free diet, these enchiladas are a versatile dish that can cater to your dietary needs.

Why not give this recipe a try and impress your friends and family with a delightful Tex-Mex meal? You’ll be rewarded with compliments and satisfied smiles all around the table. Enjoy cooking and savor the delightful flavors of Tex-Mex enchiladas!

Remember to subscribe to our newsletter to receive more delicious recipes and culinary inspirations. Visit our website regularly for exciting new dishes to try in your own kitchen. Happy cooking!